
Well ok so this is a tutorial on how to make basic banners for your own blogs and websites.
First thing you need is Photoshop and hopefully saved pictures on your PC or MAC.
All I used was pictures I had saved on my PC.
First thing I did was open the pictures I wanted to use.
I will be using these for my tutorial. Simply click all the images to enlarge them the main image you will be looking at is the smaller sideways one.
*All images are under the explainations.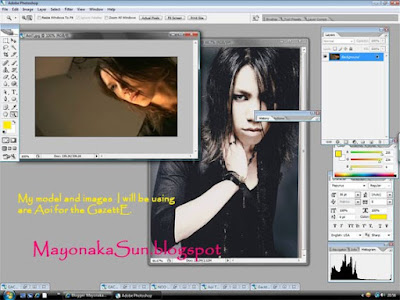 As one of my pictures was the rough size I wanted I left the sizes (small sideways one) .
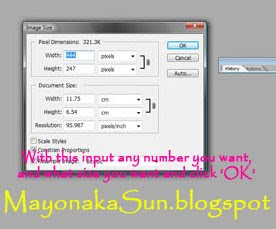
But if unfortunately your pictures are the wrong size or not the size you want you can simply change the image size by going to, 'Image' then 'Image Size'.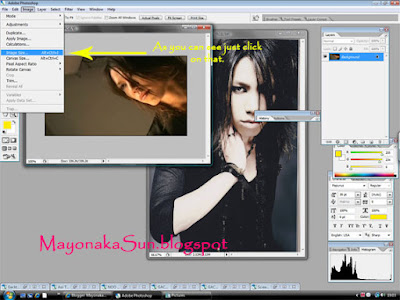
Right so first thing I did was 'duplicated the layer, by 'right-clicking' on the image in the 'layers menu', and clicked 'duplicate layer' this made an exact copy of my original layer so if any mistake occur whilst I’m making the banner, I could easily fix it by going back to the original.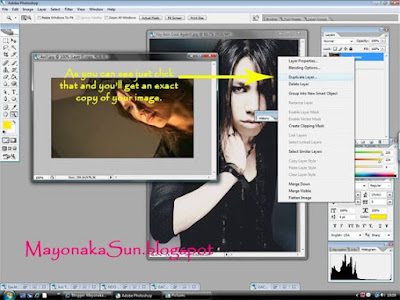 With mine I want it to be textured, as in the example I did this by going onto 'filter gallery' found under 'filter' and selectig 'filter gallery' you can select whichever effect you would like.
 As one of my pictures was the rough size I wanted I left the sizes (small sideways one) .
But if unfortunately your pictures are the wrong size or not the size you want you can simply change the image size by going to, 'Image' then 'Image Size'.

Right so first thing I did was 'duplicated the layer, by 'right-clicking' on the image in the 'layers menu', and clicked 'duplicate layer' this made an exact copy of my original layer so if any mistake occur whilst I’m making the banner, I could easily fix it by going back to the original.
 With mine I want it to be textured, as in the example I did this by going onto 'filter gallery' found under 'filter' and selectig 'filter gallery' you can select whichever effect you would like.
The only thing is, this meant the whole thing was blurry and not what I wanted. So this is where my 'duplicated layer' came in.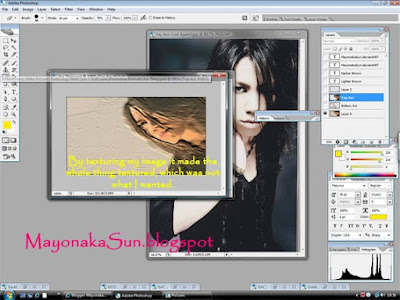 With the copy I erased the background so only the initial image was showing, after that I softened up the edges by I blurring them using the 'blur tool' (this is an optional process.)
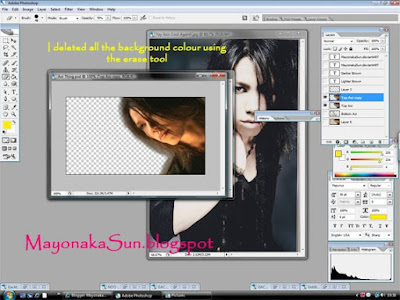
 With the copy I erased the background so only the initial image was showing, after that I softened up the edges by I blurring them using the 'blur tool' (this is an optional process.)
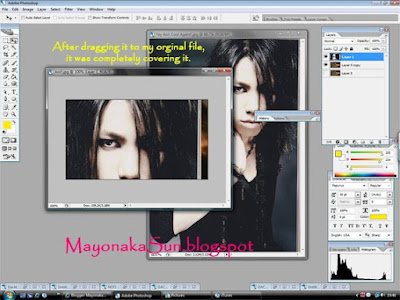
Once all those layers where put together, it looked like this (look at example), so as you can see this looks quite finished already, but is not what I wanted, so I added in my other image (see 1st image box). 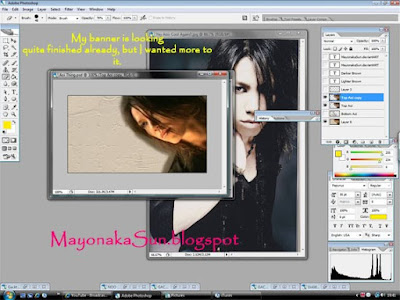

So as you can see, my other image is not on the same PS file, so I selected the 'move tool' and dragged my second image onto my first document. Which as you can see, completely covers my original image. 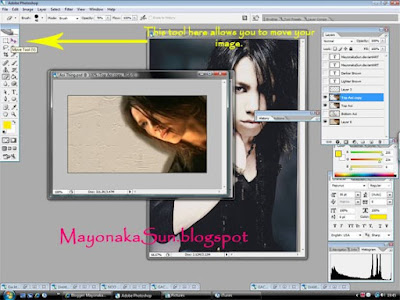


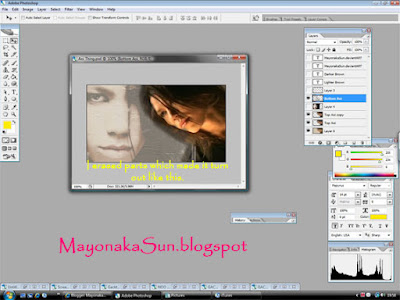
So what I done was changed the 'opacity' of the top image . I did that by selecting that layer, on the 'layers menu' then clicking 'opacity' and adjusting the opacity, which made it like this. I erased parts of that layer that I didn’t want, by just using the 'erase tool', which made it like this.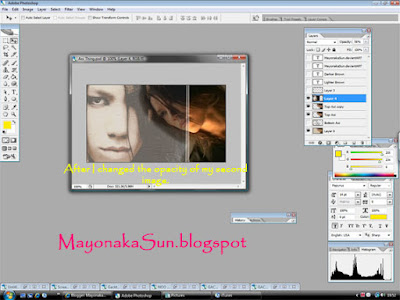
 I then adjusted the layer arrangement, by clicking and dragging the layers in the 'layer menu', which then made it like this. This mean it’s coming near the end, but I wanted to jazz it up more, so I added text to it. I done that by going to the 'type tool' making the text box on my page by clicking and dragging on the section I want and size of the box, then typing my writing.

 I then adjusted the layer arrangement, by clicking and dragging the layers in the 'layer menu', which then made it like this. This mean it’s coming near the end, but I wanted to jazz it up more, so I added text to it. I done that by going to the 'type tool' making the text box on my page by clicking and dragging on the section I want and size of the box, then typing my writing.
In this case I type 'Aoi' as it his name.
I then layer another piece of text a slightly darker colour on top of the previous in the same way, making it a bit off angle from the other one, by dragging it using the 'move tool' shown previously. And then it was complete after I had put my signature on using the same 'type tool' as before. 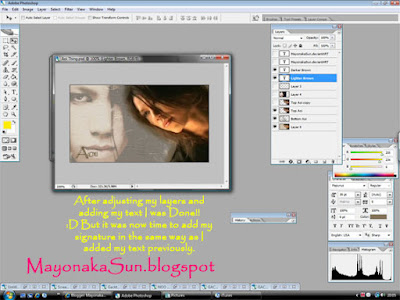


Well I hope this small tutorial helped you with making your own banners, and graphics.
Thank you for reading :)
Thank you for reading :)
Links below are the full view finished banner and another banner I also made myself using a similar technique as in this tutorial.
http://mayonakasun.deviantart.com/art/Gackt-106310235
http://mayonakasun.deviantart.com/art/Aoi-106310111
http://mayonakasun.deviantart.com/art/Gackt-106310235
http://mayonakasun.deviantart.com/art/Aoi-106310111
No comments:
Post a Comment
Please, share your thoughts~